USB-teletype
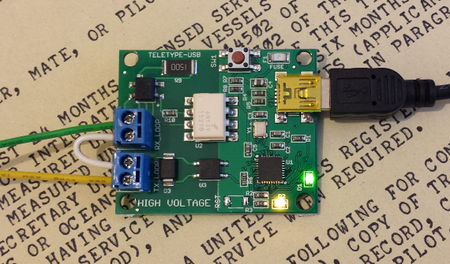
This is a compact USB to teletype current loop interface on a 1.6 by 1.4 inch pcb. It connects to a computer running Windows, Mac OSX, Linux, Android, or probably anything else via a USB Mini-B connector, and presents itself as a USB serial port, while the other end connects directly in series with a teletype loop. Data is relayed bidirectionally between the two. It does not provide loop current itself, so a loop power supply with fuse is needed if not already present.
Software
Unlike most USB serial adapters, this one uses a general purpose microprocessor rather than a dedicated interface chip like FTDI, CP2102, etc. This allows features like onboard translation between ASCII and 5-level code, selectable auto-newline, unshift on space, and others. The yellow LED flashes in sync with data sent from the computer to the teletype loop, and the green LED flashes in response to data coming from the loop. The two LEDs are inverted in sense so that on a half duplex line one will show mark and one will show space.
On initial power-up, the interface's teletype side is set to 45.45 baud and will translate between teletype 5-level code (ITA-2, Baudot) and ASCII bidirectionally, so that from the point of view of the computer, it looks like a plain ASCII terminal. ASCII codes sent to the interface which have no teletype code equivalent are ignored and not forwarded. The interface keeps track of LTRS/FIGS shift and sends the appropriate shifts as necessary. On power up it assumes LTRS until it discovers otherwise. If unshift-on-space is enabled, it will switch to LTRS mode if it sees a space character on the loop side. It can also be switched into non-translating mode, in which it simply passes through the lower 5 bits of all characters sent from the computer, and vice-versa, so that it can be used with computer software which expects to do this translation itself (i.e., BaudotRSS, HeavyMetal, etc.) In operation, the yellow LED flashes in sync with data sent from the computer to the teletype loop, and the green LED flashes in response to data coming from the loop.
Pressing the SW1 button on the interface board switches the device into command mode, in which it ignores input from the teletype loop, keeps the output marking, and presents a command-line interface via USB to the computer. "help" shows available options and how to change them. Changes may be made on the fly and can remain temporary or be saved to permanent storage with the "save" command. If saved settings are present in permanent storage, they will be loaded and used automatically on power up. This way the device can be treated as transparent unless intentionally put into config mode.
The loop side character timing and framing are synthesized completely in software, so entirely arbitrary baud rates can be specified, up to the limits of the optical interfaces (about 250 baud). Be careful of setting absurdly low baud rates. Common rates are recognized and precalculated timing used, but other arbitrary rates will get best-effort calculated timing which should be sufficient. Baud rate settings are taken only from the configuration command line, and rate changes sent the "normal" way from the computer are ignored, since typical teletype data rates are not supported via that method anyway.
Electrical
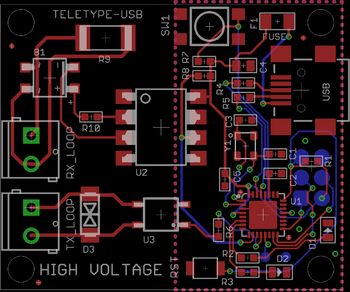
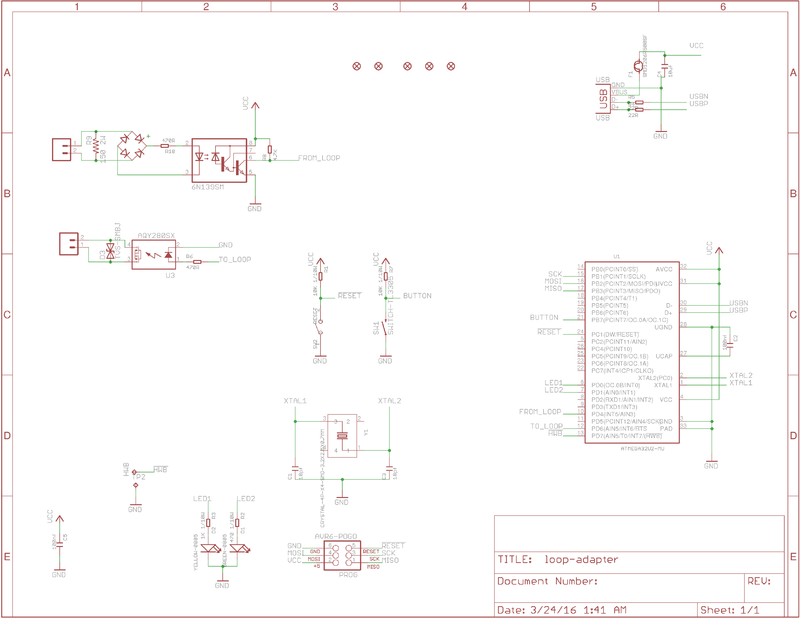
The circuit board is physically divided in half. The loop-interface side is 100% completely electrically isolated from the computer interface side. If operating the board without an enclosure, it is very important to insure that nothing conductive comes in contact with it that might bridge exposed contacts and potentially carry high loop voltage anywhere near your computer's USB interface. The loop side is protected against inductive spikes from selector magnets on the line, and should tolerate currents from <20mA to over 100mA. The loop current is sensed non-inductively by a 150 ohm, 2 watt resistor in series with the loop, which provides current to the input side of an opto-isolator. The output side is switched by another optical isolator with an on resistance around 34 ohms. Both input and output can be connected in any polarity. The device has separate connections for input and output, so it can be used in a full-duplex application with two separate loops, but for half duplex operation normally the two connector blocks would be jumpered in series. (they are also completely electrically isolated from each other.)
Modification
The controller is an Atmel atmega16u2 or 32u2 with a USB CDC-class bootloader installed via which the firmware can be updated or replaced. Typical programming software like avrdude will recognize it as type "avr109". The bootloader uses 4kb, leaving 12kb of flash free for application software on the 16u2 or 28k on the 32u2. The atmega ISP programming lines are brought out on the back side of the board on pogo-pin pads, allowing replacement of the bootloader, recovery from any kind of software corruption, or eliminating the bootloader entirely to gain flash space. Source code for the current firmware is freely available on github[1].
To-Do List
Firmware improvements being considered are:
- transparent 7 or 8 bit passthrough mode for use with 33s and the like.
- The ability, from the config command mode, to modify the ascii/baudot character translation table
- the ability to select from multiple stored translation tables
- sending pre-recorded messages like RYRYRYRY and quick brown fox with short commands
- the ability to logically invert mark and sense for input and/or output.


